Water heaters are silent champions of our homes. They ensure that every cold morning turns warm and every dirty dish sparkles clean. However, there comes a time in every water heater’s life when it needs maintenance or a complete replacement. And when that time arrives, the intricate maze of parts and decisions can be daunting. Discover the benefits of a water heater check up and learn when it’s time to replace your old unit.
Most traditional tank water heaters have a lifespan of about 8-12 years. But like any other appliance, wear and tear, coupled with neglect, can reduce that lifespan. Telltale signs like lukewarm water, rust forming around the bottom of the tank, or the pilot light going out indicate it’s probably time for a check-up or a replacement. And while some brave souls may consider venturing into the realm of DIY, it’s essential to remember: your water heater is not just a simple appliance; it’s a complex system. Make a water heater check up part of your home routine to keep small problems from growing into an overwhelming issue.
Before we dive deeper on the importance of a regular water heater check up, let’s decipher the difference between traditional and tankless water heaters. Conventional water heaters store and preheat 30-50 gallons of water in a tank. This water is used whenever someone showers, does the laundry, or washes dishes. And, as you probably have experienced, if many people use the hot water you can eventually run out. You then have to wait until the tank can heat itself up again.
On the other hand, as the name suggests, tankless water heaters heat the water directly without needing a storage tank. They provide hot water only as necessary, making them more energy-efficient in the long run. But they also can provide endless hot water since there is no storage tank being used.
Besides traditional water heaters, many homeowners are now leaning towards tankless versions. Here’s why:
Water heaters are robust appliances but can succumb to wear and tear over time, especially if you haven’t kept up with a regularly-scheduled water heater check up. Here are some common reasons why people need to replace their water heaters:
Age is a primary factor; most tank heaters last 8-12 years before efficiency drops.
Rust and corrosion inside the tank or at the inlet valve can lead to discolored water and leaks.
Speaking of leaks, a leaky tank can quickly escalate from a minor issue to a major one, necessitating immediate replacement.
Inconsistent heating, where the water is either too hot or never warm enough, is another sign.
A sediment buildup at the tank’s base can cause popping or rumbling noises and reduce heating efficiency.
Lastly, if you notice higher utility bills without a notable increase in usage, your water heater’s declining efficiency might prompt a replacement.
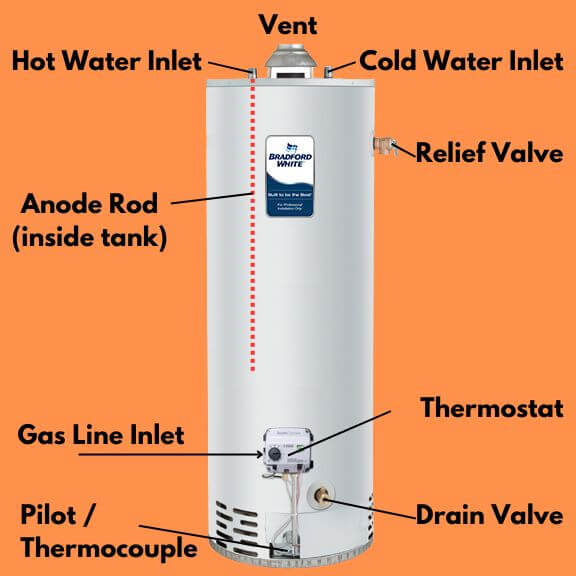
Since tank water heaters have been in people’s homes since the 1900s, they are most commonly found. There are a few items to inspect on your water heater to head off problems before they become critical.
Pro Tip: When a plumber installs your new water heater, have them replace the drain valve with a ball valve to make flushes easier.
Pro Tip: If your system has gate valves, ask a plumber to swap them out with ball valves. This would be the same for the gas lines also.
Pro Tip: You can choose different anode rods based on the elements in your water. Ask your plumber how.
Pro Tip: Water and fire are not to be messed with, so if you’re unsure, please call a reputable plumber to help set things straight again.
Pro Tip: Adjusting your water temperature periodically (like when you leave for vacation) is another way to ensure it works properly.
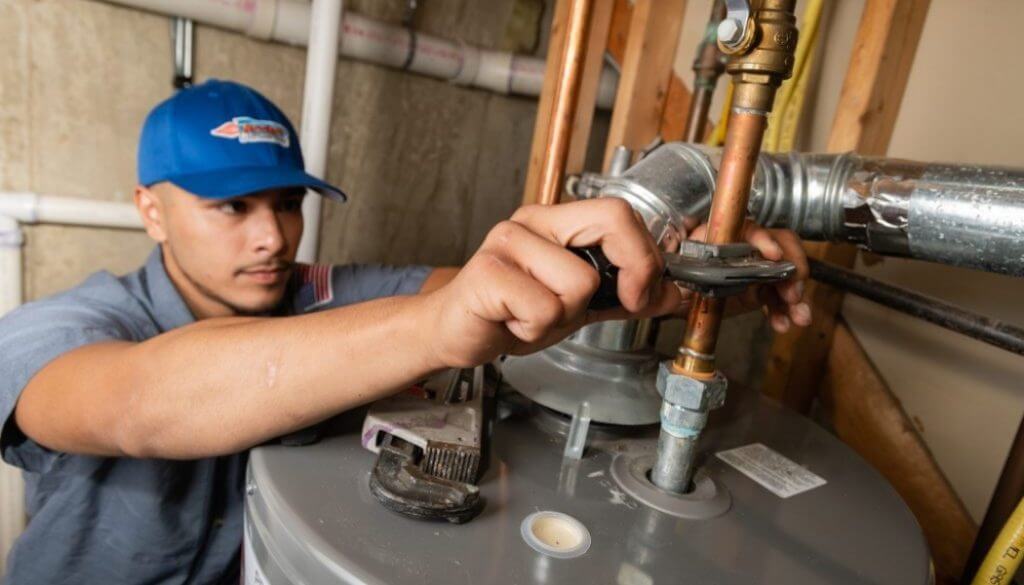
Water heater replacements, while not an impossible DIY project, definitely require having the proper knowledge or professionals by your side. Depending on your set-up, model, and experience, this can be a straightforward task or an all-day affair. In general, here’s a step-by-step walk-through for a typical water heating system:
Before starting any replacement, it’s crucial to turn off the power. For electric heaters, switch off the circuit breaker. For gas heaters, turn the thermostat to the “off” setting.
You can do this by turning off both the cold and hot water valves situated atop the water heater. The water supply is sometimes indicated by a blue handle. Then, turn the gas valve off.
Connect a garden hose to the drain valve located near the bottom of the water heater. Ensure the other end is in a location (like a drain or outside) where hot water can safely flow out. Open the drain valve and allow the tank to empty.
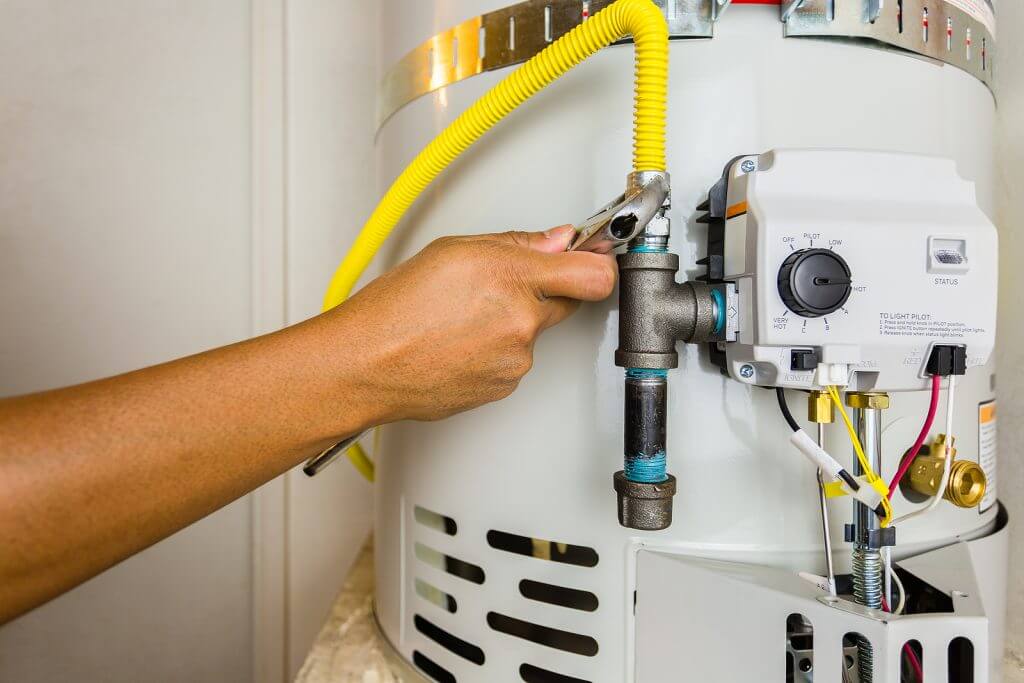
For gas heaters: Disconnect the gas line using two pipe wrenches (one to grip and one to turn). Additionally, disconnect the vent pipe from the unit.
For electric heaters: Remove the electric wires from the heater’s junction box and ensure they’re safely capped.
Place your new unit in the desired location, making sure it’s level. If necessary, use shims. Ensure a minimum clearance space is around it per the manufacturer’s instructions or local building codes.
Connect the cold water line to the cold inlet and the hot water line to the hot outlet. (NOTE: Always replace your hoses when Installing a new water heater.) You might also need to solder solid copper pipe for a stronger connection or due to building codes.
For gas heaters: Apply plumbing sealant paste on the threads and connect the gas supply line. Ensure to test for leaks using a gas leak detector.
For electric heaters: Reconnect the wires to the junction box in the unit, ensuring the right connections.
Turn on the cold water supply and let the tank fill up.
For electric heaters, turn the power back on. For gas heaters, turn the gas supply on and ignite the pilot, following the manufacturer’s instructions.
After a few hours, inspect the base and connections for any signs of water leaks. Address any leaks immediately.
A temperature setting of 120°F is usually optimal for most homes. Adjust according to your preference but ensure it’s safe for use.
Water heater replacement might look simple on paper, but it requires finesse and expertise.
If, at any point, things seem overwhelming or you need more clarity about a step, it’s best to consult with a professional.
Our step-by-step guide makes the water heater installation process seem like a breeze. But why take a gamble with something so essential?
Rocket Plumbing doesn’t just offer plumbing services; we provide peace of mind. Our team is trained in handling both tank and tankless water heaters. We ensure:
So, before you consider diving into the world of DIY water heater check up and installations, ask yourself: isn’t your home’s comfort, safety, and efficiency worth calling in the experts? Ready to install your new water heater? Contact Rocket Plumbing now, and let us handle the heavy lifting while you sit back and enjoy the endless flow of water heated to your liking!